Friday, August 17, 2012

Reese's Peanut Butter Cup Cup Cakes

Hello Lovlies! thanks for coming back! Today were baking and that...is so Seriously Savanah. Tomorrow is my boyfriend Jose's (youll hear about him a lot i promise you) 18th birthday! He asked me to make his birthday cake/cupcakes and i said of course! i asked him what he wanted and he said something with a lot of peanut butter, and that is exactly what i created, with a lot of research i found the perfect recipie to make delicious chocolate cupcakes filled with peanut butter filling and topped with a peanut butter icing. (YUM!) These cupcakes are seriously so easy and only took about an hour to complete. okay..now on to the yumminess....

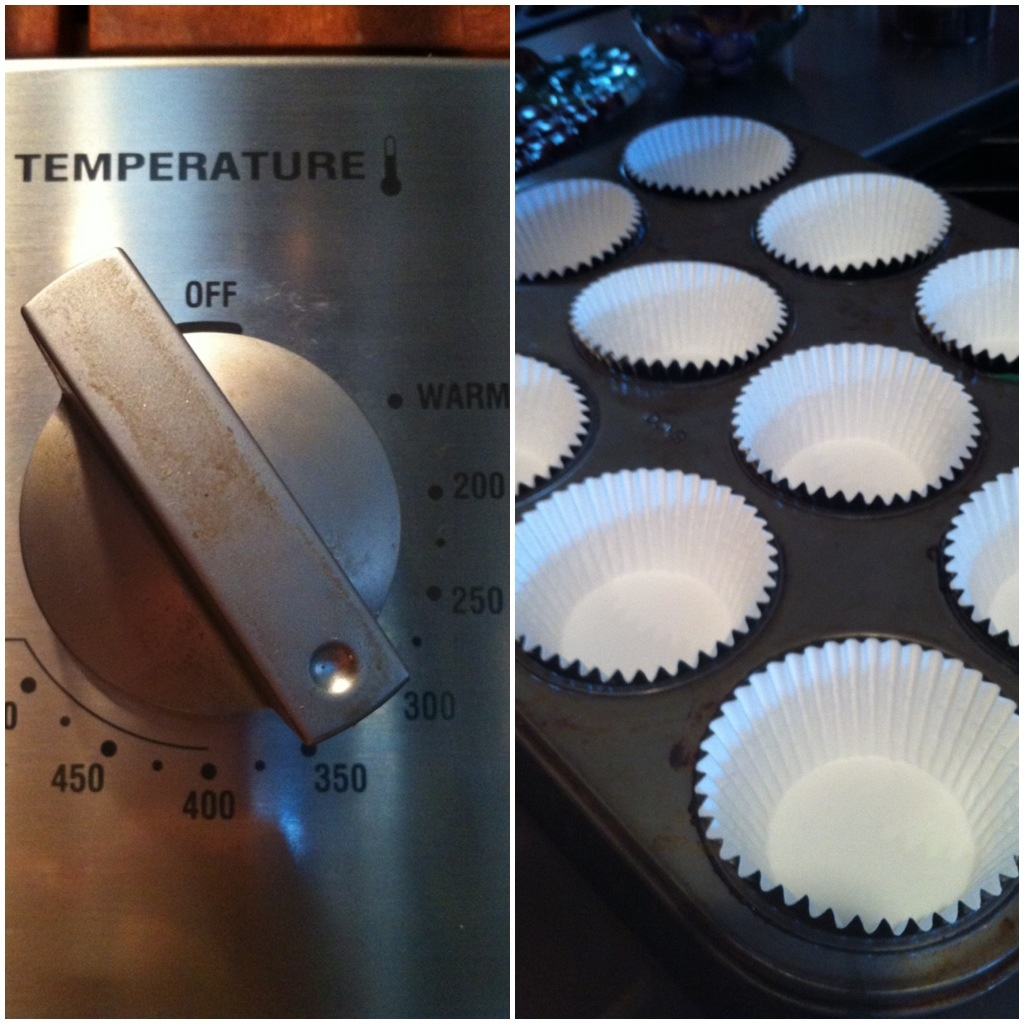
Step 1: Turn your oven to 350 degrees and line your cupcake pan with cupcake liners.


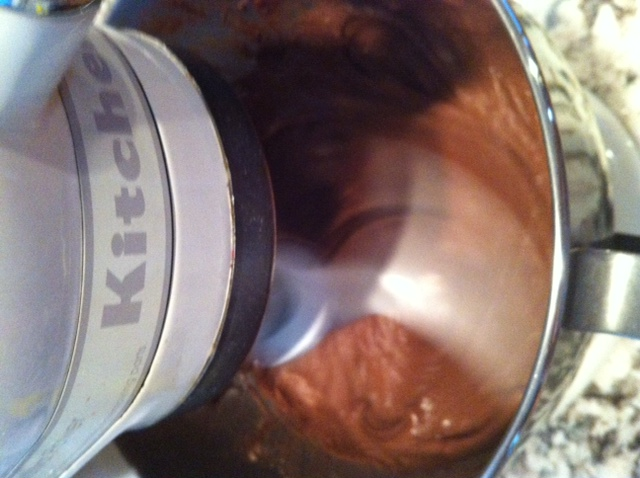
Step 2: Get out your favorite box of chocolate cup cake mix and start mixin' !


Step 3: Fill each cupcake liner about 3/4 of the way full and pop them in the oven for 19 minutes (or whatever your box says)

Step 4: while the cupcakes are baking start preparing your Peanut butter filling and Icing

Filling Ingredients

1/2 cup (1 stick) unsalted butter
1 cup peanut butter (creamy or crunchy)
1 and 1/4 cups powdered sugar


Step 5: Start by mixing just the butter and the peanut butter together
i pictured this to be difficult and annoying like mixing cookie dough? no, its nothing like that! it's so easy especially if you let the butter sit out a little bit and soften.

Step 6: once youve finished mixing the peanut butter and butter together start adding the powdered sugar a little bit at a time until youve mixed it all into your filling


Step 7: Your cupcakes are probably ready now so take them out of the oven and let them cool off COMPLETELY!

Step 8: Once cooled, start by hollowing out all of your cupcakes with a tooth pick


Step 9: Grab a large zip-lock baggy and turn it inside out, then put your hand inside the bag and grabd a corner then begin putting the peanut butter filling into the palm of your hand (that is lined with the baggy). once all the filling is in your hand turn the bag right side out and zip it shut, then twist the bag tight and snip the end off.


Step 10: begin piping the filling into each of the hollowed out cupcake holes


Step 11: Begin preparing the frosting! now the frosting is litterly identical to the filling except the mesurments change a little bit..honestly they taste the same you could just double the recipie and use the filling as filling and frosting but whatever floats your cupcake boat.

Frosting Ingredients

1 and 1/4 cups of peanut butter
1/2 cup (1 stick) unsalted butter
1 cup powdered sugar


Step 12: repeat steps 5 and 6

Step 13: Repeat step 9 using the frosting and begin swirling it on each cupcake.
this is seriously the easiest way ever to frost a cupcake, its free, and you dont dirty a knife!


And your done! They were so easy right? and so delicious! comment down below letting me know if you try it out!

(sorry for not rotating the pictures i was just so excited to get this post up)

Until next time, Savanah (:


Thursday, August 16, 2012

Review: Maybelline The Mega Plush Volum' Express mascara

Hello Ladies! I was really in the mood to blog tonight so decided why not review mascara? something I have a lot of experience with. Now when choosing a mascara, it's almost like choosing a boyfriend...or choosing what frap your gonna order from starbucks this morning...in other words, its personal! A mascara that works wonders on your bff jill might not do anything for you. It really depends on what lashes god has blessed you with. Im not a lash expert, but i know what works for me. I don't like to purchase high end mascara because i use a lot of mascara, i like my lashes very dark and noticable so i tend to go through a tube once a month. who could bare to spend 30 bucks a month on mascara when you can get one for 7 bucks at target? not me! Anyways... I have been blessed with some alright lashes... there curly and a good length (i've seen longer and i've seen shorter) Pictured below is a before and after picture of my lashes with and without mascara...in case it wasn't obvious the top is without and the bottom is with.
So that being said...i look for a mascara thats going to get my lashes noticed, something that adds a little lenth and a lot of volume. I have noticed that maybelline has never let me down so i tend not to experiment outside of my comfort brand. My all time favorite mascara that i have probably re-purchased more then a dozen times is "Maybelline The Colossal Volum' Express" (pictured below)

(i do not own this picture)

So you may ask, if thats your all time favorite mascara, then why even bother to try a new one? well im always up for a new mascara if it looks some what promising...that being said when maybelline came out with a new mascara "The Mega Plush Volum' Express" it got a TON of hype...and all of it was good, how could i not try it? Enough blabber...on to the review i go!
(i do not own this picture)

As you can see, the actual brushes dont look too different at first glance...but if you look closer Colossal is more of an enlarged "typical" mascara as Mega Plush features more oval shaped bristles. Also, the formula between the actual mascara in each tube is different...With this new Mega Plush mascara, maybelline launched their new "gel formula" the actual mascara didnt seem much different to me so i dont know about all this gel nonsence but whatever. Another new feature to this mascara is on the wand. as you can see...
(i do not own this photo)

there is a kink in the wand that makes it flexible and able to move more generously through your lashes. i think this is where maybelline made there mistake, this kink makes the wand more difficult to control and actually makes it harded to coat each individual lash. Also, back to the oval shaped bristels...with longer bristles in the middle and shorter ones on the sides...my middle lashes always get overly coated with mascara making them clumpy and gross. One coat of this mascara give length but a VERY natural length. It makes your lashes look longer but definatly not blacker. I would recomend this mascara by itself to a makeup beginner. How ever to anyone else, i would suggest appying two even coats of this mascara for length and one coat of another mascara that will darken and thicken your lashes. All in all, it's an Okay mascara, but i dont think ill be re purchasing it.

If you made it all the way to the end, Thank-you! and don'd forget to subscribe!
Stop by tomorrow for something tastey (;

Now that was...Seriously Savanah.

Welcome to my blog!

Hello, Thank you for stopping by my blog. This blog is all about fashion, beauty, food, diys & giys, and from time to time some details about the interesting date me and my boyfriend went on last night. This might not be the most interesting part of your day but i can promise you that after reading one of my posts you'll be saying "wow, that is so seriously savanah."
More about me you ask? well that's my favorite topic! (just kidding, kinda.)
My name is Savanah (yes like the state, and no i've never been there). I'm 17 years old and a senior in high school. Im a San diego girl, Born and raised. I'm not exactly sure what im going to do with my life, but whats the adventure of growing up if you know exactly what your going to do? I imagine my life 6 years from now featuring blogging, something with beauty and fashion and maybe some party planning? so yes, my dream job would probably be a wedding planner, who designs the dress and does your hair and makeup! But anyways, i look forward to posting every aspect of my life and learning about you as well, so please subscribe & dont forget to come back and check up on me so you can get your daily dose of everything that is seriously savanah.